https://southgeorgiaveincenters.com/blogs/handmade-modern-blog.atom Kid Southgeorgiaveincenters - Handmade Modern Blog 2022-01-18T13:01:17-06:00 Kid Southgeorgiaveincenters https://southgeorgiaveincenters.com/blogs/handmade-modern-blog/diy-pom-pom-tassel-garland 2022-01-18T13:01:17-06:00 2022-01-18T13:01:17-06:00 DIY Pom Pom + Tassel Garland AKM Borhanich

I’ve been a longtime fan of tie dye and dip dyed crafts, but when you’re working with acrylic yarn, they can be challenging and sometimes even impossible to dye. With the majority of yarns being acrylic or comprised of synthetic fiber, this technique is perfect for creating the look you’ve been after with the supplies you already have or can easily acquire. Not only will I be showing you how to use fabric paint as a dye, we will also go through the steps of creating an abstract pom pom and how to combine them all into a colorful garland to adorn your walls.  


Supplies:

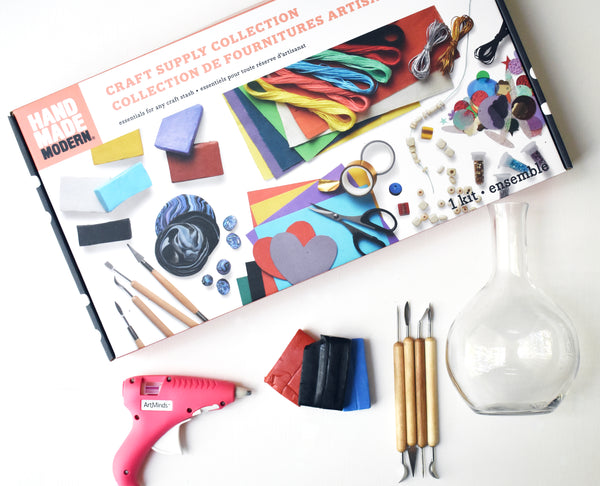
  • Handmade Modern Pom Pom + Tassel Kit include:
    • Yarn in a variety of colors
    • Pom Pom Template
    • Tassel Template
    • Scissors
    • Twine 
    • Sewing Needle
  • White Fabric Paint
  • Water
  • Vessel to mix paint in 
Hand Southgeorgiaveincenters Artboard


Step 1: Start this craft by making all the pom poms. Using the circular C templates that come in three different sizes, select the size you’d like for your pom pom. Holding your yarn and template together in one hand, take the trailing yarn and wrap it around the template by pulling the yarn into the gap of the template and around repeatedly. For the pom pom to contain an abstract pattern, add different colors of yarn next to each other and overlapping on the template. 

Step 2: Now that your template is full, cut along the outer edge of the template while making sure the yarn stays in the center of the template. Once all the yarn is cut, take an additional piece of yarn, and tie it around the center of the yarn, creating a tight center with a poof of yarn on either side of the template. Now pull the template off the pom pom and trim any longer pieces of yarn to make an even fluff ball of yarn. 

Continue the same steps to make at least 3 pom poms. 

Step 3: Next up is making a tassel, use the rectangular template in the kit to create three different sizes of tassels. Holding the template in one hand, add a strand of yarn in the same hand, holding it against the bottom of the template (the top of the template has the cut out in it). Wrap the yarn around the outer edge of the template from bottom to top and around the bottom again, continue wrapping it around the template multiple times to create a thick wrap of yarn. 

You can use multiple colors by holding multiple strands of yarn at the same time and follow the same technique. 

Step 4: Once you’re finished wrapping the template, cut the yarn and tuck the tail of the yarn into the wrapped chunk of yarn. Cut a 6” piece of additional yarn and slide it under the wrapped portion, to be in the center of the wrap. Pull the yarn to the top and tie a double knot around the chunk of yarn. 

Step 5: Once you’re finished wrapping the template, cut the yarn and tuck the tail of the yarn into the wrapped chunk of yarn. Cut a 6” piece of additional yarn and slide it under the wrapped portion, to be in the center of the wrap. Pull the yarn to the top and tie a double knot around the chunk of yarn. 

Step 6: Using the cut out at the top of the template, take another piece of yarn, and wrap it around both sides of the wrapped portion of yarn and tie a knot to hold all the yarn together, creating a “neck” on your tassel.

You can wrap it around multiple times to create a longer “neck” on your tassel, depending on the style of tassel you’re making.

Step 7: Slide the tassel off the template and cut the yarn at the bottom to separate the yarn on only one end. Trim the loose end of the tassel to make the yarn even. 

Continue the same steps to make multiple tassels in varying sizes.

Yarn In A Variety Of Colors

Step 8: When you’ve created all your tassels, it comes time to dip dye them. Fill a plastic cup with half a cup of water and add in a heavy-handed dose of white fabric paint. Mix the two substances thoroughly. The mixture should be watery yet opaque.

Step 9: Dip the finished tassel into the paint and water mixture, leaving at least ½ of it out of the water to clearly see the dividing line between the 2 shades of colors.
Gently squeeze out extra water from the tassel and set aside to dry. 

Tip: Don’t ring out all the water or it will remove all the color. This technique creates a dyed look but the color is coming from the paint that is sitting on top of the fiber rather than soaking into the fiber and changing it’s color.

Continue the same steps until all your tassels have been dyed.

Step 10: Cut a 3’ length of twine and tie a knot on 1 end by creating a loop at the end that will act as a barrier on both ends and a simple way to hang the garland with as well.

Step 11: Thread the sewing needle with the opposite end of the twine and string the tassels and pom poms on. Create a repeating pattern or a completely random design, depending on your style or event, this craft is sure to work for everyone.

Step 12: When you finished stringing the pom poms and tassels on, tie off the twine with a loop like you did on the opposite end. All of your pom poms and tassels are adjustable due to the way they’ve been strung on so you can adjust the spacing as desired.

DIY Pom Pom + Tassel Garland


Now that you’ve made this pom pom and tassel garland, I hope you learned a few new techniques that can one in handy for all your future pom pom and tassel crafts!

Thanks for crafting me and Handmade Modern!

Thanks for crafting with me and Handmade Modern! We want to see your finished art projects. Post on social media what you created and tag us using the hashtags #handmademodern #gomakestuff


 Tessa Anderstrom

This post is by fiber artist and craft enthusiast Tessa Anderstrom, the owner of handmade shop Studio Jane which focuses on sustainably made home décor and handmade art. As an avid DIYer with a passion for learning new skills, Tessa enjoys sharing that knowledge with crafters of all ages.

]]>
https://southgeorgiaveincenters.com/blogs/handmade-modern-blog/make-a-diy-vase-with-clay-accents 2022-01-18T13:00:56-06:00 2022-01-18T13:00:56-06:00 Make a DIY Vase with Clay Accents AKM Borhanich

You can up-cycle a vase you already own with this craft tutorial! We’ll use polymer clay from the Handmade Modern Craft Supply Collection to add unique and handmade design accents to any vase or planter. 

More

]]>

If you’re like me, then you have a whole cabinet filled with vases from previous bouquets, gifts, and treasures you spotted at secondhand shops. However, after awhile, they may seem boring, and you want something new. So, rather than buying more goods that will eventually end up in the same cabinet, you can up-cycle a vase you already own with this craft! 

We’ll use polymer clay from the Handmade Modern Craft Supply Collection to add unique and handmade design accents to any vase or planter. One of my favorite things about polymer clay is the ease of using it, especially for beginner crafters. In addition, it doesn’t dry out because it must be baked to cure and harden, which is perfect for attempting new designs and taking your time creating something special.

Supplies:

  • Handmade Modern Craft Supply Collection includes:
    • Polymer Clay
    • Clay Working Tools
  • Vase or Planter (glass, ceramic, or metal will work)
  • Hot Glue Gun
  • Parchment Paper
  • Baking Sheet
  • Working Oven set to 275 degrees

 Handmade Modern Craft Supply Collection


Step 1: Start by working your clay to make it pliable. Just fold it back and forth between your hands to soften the clay. Once you’ve softened your clay, it’s time to start blending colors to make a custom color palette. To blend shades, simply take 2 different colors and work them between your fingers the way you did to make the clay pliable. 

For example, I created a terracotta shade by using 2/3 yellow with 1/3 red, add a little more or less red for the perfect shade of orange.


Step 2: The two designs we’re creating are an abstract plaid and a three-dimensional polka dot, but you can use similar techniques to create many different designs. Before starting each design, set your oven to 275 degrees, let it preheat while you work.


Step 3: For the abstract plaid, select 3 or more colors and roll each color into a thin, ¼” thick or less piece of clay. Using the blade tool and metal ruler, cut ¼” wide strips by straightening your ruler on top of the flattened clay and running your blade along the edge, move your ruler over ¼” and run your blade along the ruler again to create your clay strip. You’ll need a minimum of 4 strips for each plaid section on your vase, in the sample vase I used 16 strips that measure from 3” to 6” in length. Using the same blade tool, trim both ends of each strip for clean edges on all sides.


Step 4: Gently move your strips of clay onto a parchment-lined baking sheet, be sure to lay each strip with care so they are level. If they are bent or wavy, they will bake that way permanently.


Step 5: Transfer your baking sheet into the oven and bake for 8-10 minutes until the strips are hardened yet still pliable. If you bake them too long, they can become brittle and break.


Step 6: While your first design is baking, you can start on the polka dot design. Taking each color of clay separately, pinch off a small portion of clay, about the size of a quarter or less.


Step 7: Start rolling that bit of clay in between both palms of your hands in a circular pattern to create a ball. Continue rolling the clay ball gently with your fingers or palms until it’s smooth and all lines have been smoothed out. Continue these steps until you have 15 or more clay balls in varying sizes. 


Step 8: Transfer these onto a parchment-lined baking sheet, be sure no polka dots are touching, or they will fuse together in the oven. Place your baking sheet in the oven for 10 minutes when the first batch is complete. 


Step 9: Once both designs are out of the oven and cooled, it’s time to attach all these clay pieces to your vases. Turn your first vase onto its side and plug in your glue gun. Tacky glue will also work for this craft but will take a bit longer to dry before you can rotate your vase to do all sides.


Step 10: To create the abstract plaid pattern, select 4-6 strips including all colors and arrange them in an overlapping pattern. Attach your first layer of 2-3 strips horizontally approximately an inch apart from each other, then take the other 2-3 strips and attach them vertically on top of the horizontal strips. Create a composition with more gaps or shift some to one side or another for a dissected plaid pattern.


Step 11: Continue these same steps in multiple places around your vase. Set aside to let your adhesive set and move onto your second vase.


Step 12: To attach your 3D polka dots, use your hot glue gun by putting a small dot of glue on the back of a clay ball and press it into the side of your vase.


Step 13: Place each dot sporadically around the vase for a funky style; you can also create stripes of polka dots for a more defined pattern. 

Continue gluing each dot one at a time until you have a classic polka dot pattern on your vase.


Once your vases are complete, and your glue is dry, they’re ready to decorate your home with. Gather your favorite blooms to fill your new and unique vases; they’re sure to be a conversation piece in any room!

Thanks for crafting with me and Handmade Modern! We want to see your finished art projects. Post on social media what you created and tag us using the hashtags #handmademodern #gomakestuff


 Tessa Anderstrom

This post is by fiber artist and craft enthusiast Tessa Anderstrom, the owner of handmade shop Studio Jane which focuses on sustainably made home décor and handmade art. As an avid DIYer with a passion for learning new skills, Tessa enjoys sharing that knowledge with crafters of all ages.

]]>
https://southgeorgiaveincenters.com/blogs/handmade-modern-blog/diorama-ornament-diy 2021-12-08T14:06:13-06:00 2022-01-14T04:35:42-06:00 Diorama Ornament DIY AKM Borhanich There’s something charming about handmade ornaments that make trimming your Christmas tree extra special! The DIY Ornament Kit includes two paper mâché balls which you can turn into FOUR diorama ornaments.

More

]]>
There’s something charming about handmade ornaments that make trimming your Christmas tree extra special! The DIY Ornament Kit includes two paper mâché balls which you can turn into FOUR diorama ornaments. So put on your crafting apron, play your favorite holiday album, and we’ll show you one way to create a miniature winter wonderland scene.

Materials Needed: 

  • DIY Ornament Kit
  • Hot Glue Gun
  • Hot Glue Sticks
  • Scissors
  • Pin Drill or Awl
  • 2 White 1-inch Pom-Poms
  • 0.5-inch Black Pom-Pom
  • Black Felt cut into 0.75-inch round circle
  • Orange Felt cut into 0.5-inch long triangle
  • Ribbon
  • 2 Tiny Black Buttons
  • Black Sticky Beads
  • Miniature Bottle Brush Tree
  • 2 Miniature Presents
  • Fiber Fill
  • 2 Fuzzy Sticks 
  • Bow

DIY Ornament Kit

Instructions: 


Step 1

Paint the inside of a half sphere with blue paint. Once dry, paint the outside with white paint. Carefully set aside to dry where it won’t be disturbed.

DIY Ornament Kit

DIY Ornament Kit

Step 2

While the paint dries, let’s assemble the snowman! Make the face by sticking a couple sticky beads onto the white pom-pom for the eyes and glue the orange felt for the carrot nose.

 DIY Ornament Kit

DIY Ornament Kit

Step 3

For the hat, glue the black pom-pom on top of the black felt. Then glue the hat on top of the head.

DIY Ornament Kit

DIY Ornament Kit 

Step 4

For the body, glue a couple buttons onto another white pom-pom. Then glue the head onto the body.

DIY Ornament Kit

DIY Ornament Kit 

Step 5

Wrap a bit of red ribbon around the neck and secure with a bit of glue to make a scarf. Your mini frosty snowman is ready!

DIY Ornament KitDIY Ornament Kit 

Step 6

Once the paint is dry, use the gold paint marker to draw some stars on the inside of the sphere.

DIY Ornament Kit

Step 7

Use a pin drill and carefully make a hole on top of the sphere. Don’t drill the hole too close to the edge to counterbalance the weight of the ornament. Otherwise, the ornament will face upward instead of forward.

DIY Ornament Kit

Step 8

Measure and cut a 6-inch piece of string. Tie a double knot at the end.

 DIY Ornament Kit

DIY Ornament Kit

Step 9

Thread the string through the hole.

DIY Ornament Kit

Step 10

Glue a pipe cleaner around the circumference of the sphere. Repeat using another pipe cleaner for extra texture and fluff.

DIY Ornament Kit


Step 11

Now we’re ready to fill the diorama! To make a snowscape, glue the fiber fill onto the inside bottom of the sphere.

DIY Ornament Kit 

Step 12

Then glue the snowman, tree, and present on top of the snow.

DIY Ornament Kit

DIY Ornament Kit 

Step 13

Sprinkle a bit of snowflake glitter on top for extra sparkle! There’s no need for glue as the edges of the snowflakes will catch onto the fiber fill.

DIY Ornament Kit 

Step 14

Finish off the ornament by gluing a gold ribbon at the bottom!

DIY Ornament Kit 

You can use a variety of miniatures to fill your little diorama to create all kinds of holiday scenes. The mini dioramas are an adorable site to see hanging on your Christmas tree!

DIY Ornament Kit


Gina Kim Gina Kim is an artist and designer based in New Jersey. After graduating from the Rhode Island School of Design, she entered the toy and craft industry where she has developed children’s products for almost 15 years. For the holidays, she is looking forward to her favorite personal tradition of curating and baking the perfect Christmas cookie box which has been six years in the making!


]]>
https://southgeorgiaveincenters.com/blogs/handmade-modern-blog/festive-holly-garland-diy 2021-12-03T14:47:05-06:00 2022-01-14T04:57:01-06:00 Festive Holly Garland DIY AKM Borhanich Using the Hand Southgeorgiaveincenters Craft Library, we will create a custom holly garland for the Christmas season. Featuring a variation of shades of construction paper, as well as fabric, we will cut out holly leaf shapes to create a two-tone style leaf. In addition to the paper elements, we will paint and glitter wooden beads to create red berries to string between the holly leave for a three-dimensional effect! This garland is sure to be one you love unpacking every December!

Supply List:

  • Solid Construction Paper (some colors included in Hand Southgeorgiaveincenters’s Crafts Library)
  • Wooden Beads (included in Hand Southgeorgiaveincenters’s Crafts Library) 
  • Extra Large Wooden Beads
  • Solid Sheets of Fabric (included in Hand Southgeorgiaveincenters’s Crafts Library)
  • Natural Felt (or color of your choice)
  • Embroidery Thread (included in Hand Southgeorgiaveincenters’s Crafts Library)
  • Red Glitter (included in Hand Southgeorgiaveincenters’s Crafts Library)
  • Liquid Glue (included in Hand Southgeorgiaveincenters’s Crafts Library)
  • Hot Glue
  • Scissors (included in Hand Southgeorgiaveincenters’s Crafts Library)
  • Large Sewing Needle (included in Hand Southgeorgiaveincenters’s Crafts Library)
  • Red Paint (or color of your choice for berries)
  • Paint Brush
  • Pencil or Marker for drawing

Watch the Tutorial

]]>
https://southgeorgiaveincenters.com/blogs/handmade-modern-blog/holiday-house-diy 2021-11-17T14:30:19-06:00 2022-01-14T05:02:34-06:00 Holiday House DIY AKM Borhanich Gift Wrap Stamp Kit. 

More

]]>
 

The holidays will be here before you know it! Here’s a fun way to add a personal touch to any gift by stamping a gingerbread house inspired design. Plus, your gifts can double as winter decor! Hand Southgeorgiaveincenters’s Gift Wrap Stamp Kit includes a variety of stamp shapes but you can also make custom stamps with your own designs. The combinations are endless to make your gift extra special!

Handmade Modern Holiday House Gift Wrap  

Materials Needed: 


Instructions: 

Step 1

Crease the Kraft paper over the edges of the gift box. This will help create a guide for where to stamp your design.

Handmade Modern Holiday House Gift Wrap

Handmade Modern Holiday House Gift Wrap 


Step 2

To make custom stamps, draw designs on the backside of the foam sticker sheets with a fine tip marker. Here we have some basic gingerbread house shapes: a window, door, shingles, and a bit of ivy. Don’t throw away the negative spaces in the window and door! They can be used as siding and brick shapes.

Handmade Modern Holiday House Gift Wrap

Step 3

Carefully cut out the shapes using a craft knife and ruler.

Handmade Modern Holiday House Gift Wrap 

Step 4

Peel off the foam sticker and mount it onto a wooden block. Your custom stamp is ready!

Handmade Modern Holiday House Gift Wrap

Handmade Modern Holiday House Gift Wrap 

Step 5

Use the white ink pad to apply ink by padding it onto the stamp. Apply a generous amount for best coverage.

Handmade Modern Holiday House Gift Wrap 

Step 6

Using the Kraft paper creases as a guide, press the stamp firmly onto the working area and gently lift it up.

Handmade Modern Holiday House Gift Wrap 

Step 7

Continue stamping using the other designs.

Handmade Modern Holiday House Gift Wrap

Handmade Modern Holiday House Gift Wrap

Handmade Modern Holiday House Gift Wrap 

Step 8

You can play with the design and add finer details and embellishments with a white paint marker.

Handmade Modern Holiday House Gift Wrap

Handmade Modern Holiday House Gift Wrap 

Step 9

The ink dries quickly so you’re ready to wrap it up!

Handmade Modern Holiday House Gift Wrap

Handmade Modern Holiday House Gift Wrap

Handmade Modern Holiday House Gift Wrap 

Your special present is ready for gifting! Your gifts can also double as winter decor! Gather them together to make a holiday village and display them on a mantel or under a tree while they wait to be given.

Handmade Modern Holiday House Gift Wrap

Handmade Modern Holiday House Gift Wrap 


Gina Kim is an artist and designer based in New Jersey. After graduating from the Rhode Island School of Design, she entered the toy and craft industry where she has developed children’s products for almost 15 years. When she is not crafting, drawing cartoons, or baking sweet things, she can be found sampling the latest flavors at any of her favorite ice cream shops.

Gina Kim Bio
]]>
https://southgeorgiaveincenters.com/blogs/handmade-modern-blog/fall-watercolor-banner-diy 2021-09-22T09:34:52-05:00 2022-01-14T04:56:28-06:00 Fall Watercolor Banner DIY Kid Southgeorgiaveincenters

We will show you how to create a fall banner using the Handmade Modern Watercolor Set. You can get festive and hang it on your door or if you want to see it all day, display it on your wall. 


More

]]>
 

The leaves are starting to change and pumpkins are popping up everywhere, that means it is time for Fall and all the festivities that come along with this amber filled season. When a hint of cool air hits our cheeks we all know summer is passing and our home decor is shifting.

In this tutorial I will show you how to create a fall banner using the Handmade Modern Watercolor Set. You can get festive and hang it on your door or if you want to see it all day, display it on your wall. It only requires the Watercolor Set and a handful of supplies that you may already have laying around the house.

Fall Watercolor Banner DIY | Handmade Modern  

Supplies Needed: 

  • Handmade Modern Watercolor Set
  • One piece of 300lb Cold Press Watercolor Paper, I used a 12x16 sheet (cut down from a 12x18” sheet) but if you want a smaller banner you can use an 11x14” or 8x10” sheet.
  • 15” wood dowel ( if you do you use a smaller sheet of watercolor paper, use a shorter dowel to accommodate the smaller sized banner. For example, for an 8x10” sheet I suggest a 10-11” dowel.)
  • Ribbon or jute for hanging
  • Hot Glue Gun
  • Scissors
  • Pencil
  • Ruler
  • Water cup and paper towel for painting
Fall Watercolor Banner DIY | Handmade Modern

Instructions:  

Step 1

Grab your ruler and place it at the bottom of your paper. Measure to the center of your paper and mark it with a dot.

Fall Watercolor Banner DIY | Handmade Modern

Step 2

Starting from the bottom. measure 4 inches up the side of your paper and make a mark on the edge. Do this for both sides. If you did choose to use an 8x10” sheet of paper, measure 2 inches up the side instead of 4 inches.

Fall Watercolor Banner DIY | Handmade Modern  

Step 3

Then using the ruler, line it up with the dot on the bottom to the dot along the edge of the paper, creating an angle. Then draw a line across to mark the paper. Do this for both sides.

Fall Watercolor Banner DIY | Handmade Modern

Fall Watercolor Banner DIY | Handmade Modern  

Step 4

Once your paper is marked, use your scissors to cut along each line. You will end up with a banner shape.

Fall Watercolor Banner DIY | Handmade Modern  

Step 5

While your glue gun is heating up, center the wooden dowel along the top edge of the paper. Use your pencil to mark the two places where the dowel meets the edge of the paper (right and left side). Doing this will help you place the dowel center to the paper quickly after you apply the glue. Once the dowel is marked and the glue is hot, apply the glue in a thin line in between the two marks made on the dowel. Then place it on the top edge of the paper and press down.

Fall Watercolor Banner DIY | Handmade Modern  

Step 6

Once the glue is dry, it is time to start outlining the design. Using your pencil lightly, create a large open oval, leaving space along the edges. On the inside of the oval write “ Happy Fallidays.”

Fall Watercolor Banner DIY | Handmade Modern

Fall Watercolor Banner DIY | Handmade Modern  

Step 7

It is painting time! Grab your Handmade Modern Watercolor Set and use the one round brush in the set to paint the whole banner. Start by using one of the reds to paint in the word “Happy” and then use orange to paint in “Fallidays.”

Fall Watercolor Banner DIY | Handmade Modern

Fall Watercolor Banner DIY | Handmade Modern  

Step 8

Using a mix of reds and yellows, paint mini apples, using the oval line as a guide for placement. You want them spaced out so you can later paint leaves around them.

Fall Watercolor Banner DIY | Handmade Modern  

Step 9

Start adding some fall colored flowers towards the top half of the banner, spacing them out along the oval line. Explore the idea of mixing colors to get deeper fall hues. Mix a little bit of blue into the red to get a dark red. If you want more of a purple blue, mix more blue with a bit of red. If you want a chocolate red, mix red and a bit of brown together.

Fall Watercolor Banner DIY | Handmade Modern

Fall Watercolor Banner DIY | Handmade Modern  

Step 10

Start painting leaves and berries into the empty spaces around the apples and flowers, using orange, yellow and red.

Fall Watercolor Banner DIY | Handmade Modern

Fall Watercolor Banner DIY | Handmade Modern

Fall Watercolor Banner DIY | Handmade Modern

Fall Watercolor Banner DIY | Handmade Modern  

Step 11

Take a look at the full painting and make sure it looks nice and full. If you see any spaces, fill them to complete the painting of the banner.

Fall Watercolor Banner DIY | Handmade Modern  

Step 12

Once the painting is dry, cut some ribbon to the length that you want for hanging the banner. Tie a knot around both ends of the dowel to attach the ribbon.

Fall Watercolor Banner DIY | Handmade Modern  

The project is complete. Now you have a new beautiful fall decoration to add some festivity to your home!


Rachel

Rachel is the artist and founder of Pink Puddle Studio LLC. Her mural work has been televised on CNBC’s Cash Pad. Her work has been featured in HGTV Magazine, Phoenix New Times, Phoenix Home & Garden, Arizona Highways Magazine and College Times.

Connect with Rachel on instagram @pinkpuddlestudio and www.pinkpuddlestudio.com

]]>
https://southgeorgiaveincenters.com/blogs/handmade-modern-blog/nature-drawing-tutorial 2021-09-17T12:16:10-05:00 2022-01-14T05:12:18-06:00 Nature Drawing Tutorial AKM Borhanich

Gather & Draw Simple Sketches from Nature

I’ve learned a simple trick when I draw, don’t obsess! If you’ve ever been frustrated when sketching, chances are you’re trying to replicate what you see-like a photograph. Maybe you snap your pencil in half, upset and comparing yourself to an “Old Master”. I’ve been there. Why not discover your own style and start by observing nature’s gifts of textures and shape? We’ll explore the many ways to use charcoal sticks, pastels and pencil lead to create abstract patterns and compositions. By controlling how hard or soft we press, we’ll discover a vast range of results. Go bold, and push charcoal across the pagesmudging and erasing your way to satisfaction. Or...tread lightly and articulate the details that inspire you. Drawing doesn’t have to start with rulers and rules, it can simply be the things you find outside.

SUPPLIES:

By now your hands must be filthy, isn’t it wonderful? Wash up, it’s time to frame (and hang) your workeven if it’s not perfect! I promise you will fondly look back on how nature was your guide to drawing and how you loved it.

Thanks for crafting with me and Handmade Modern! We want to see your finished art projects. Post on social media what you created and tag us using the hashtags #handmademodern #gomakestuff

 Cara Bonilla

After earning a BFA in Graphic Design, Cara Bonilla pursued a career filled with creative expression, which landed her the current title of Senior Creative Director. She’s passionate about all things handmade, filling her days with making tasty meals from scratch, sewing, tending to her moon garden, among other crafty things. Cara lives in Oak Park, IL, with her designer husband, who is equally obsessed with learning and exploring all things that spark creativity.

]]>
https://southgeorgiaveincenters.com/blogs/handmade-modern-blog/beginner-embroidery-craft-tutorial-craft-supply-collection-kit 2021-09-02T15:38:49-05:00 2021-09-02T15:39:11-05:00 Beginner Embroidery Craft Tutorial – Craft Supply Collection Kit Kid Southgeorgiaveincenters Embroidery has become one of my favorite hobbies because it has the perfect amount of repetition to keep my hands busy while being small enough to take with me almost anywhere. As we move through the steps, it may seem like the majority of embroidery is prep work plus untangling knots in your thread, but once all your prep is complete, the stitching is fun and relaxing. 

In this craft tutorial, we focus on setting the fabric in your hoop and a few basic stitches that are great for any beginner crafter and will leave you with a finished piece of artwork!


Supplies:


Tools:

  • Scissors
  • Hot Glue Gun
  • Pencil
  • White or Light-colored Eraser

 Beginner Embroidery Craft Tutorial – Craft Supply Collection Kit - Handmade Modern

Step 1: To begin your embroidery, take your wooden embroidery hoop, up to a 6” diameter hoop will work best when you select your fabric square from the Handmade Modern Craft Supply Collection. Loosen the tightening mechanism at the top of the hoop and separate the two hoops. 


Step 2: Place the simple hoop on your tabletop and put your fabric on top, then place your second half of your hoop on top of the fabric. Line up your hoops and be sure your top hoop is loose enough to gently press it down to sandwich the fabric between the two hoops. 


Step 3: Begin tightening the hoop by twisting the mechanism to make the fabric taut inside. Pull the edges of the fabric lightly and evenly on all sides as you tighten the hoops to create tension on the fabric. If you feel your fabric is beginning to stretch or distort, loosen your hoops enough to keep your fabric tight yet not strained.


Step 4: Now that your fabric is set, it’s time to start your design with a pencil sketch. Using a standard pencil, draw a light-handed sketch to easily follow with your stitches, in this case we drew a cactus shape on one embroidery and wrote out letters with a cactus on the other. Use painter’s tape or a metal ruler to keep your lettering straight and level. Also, you should be able to easily erase any pencil lines if you make a mistake in your sketch, having a light-colored eraser is a great tip to be sure it doesn’t leave any residue on your fabric.


Step 5: To prep your embroidery thread, cut a 2-3’ length of thread in the color of your choice and separate the thread into 2 pieces. Standard embroidery thread is comprised of 6 individual threads and we want to separate it into 2 lengths of 3 threads for a more delicate looking stitch.


Step 6: Next, start your embroidery at one end of your design and puncture your fabric from the back to the front. Be sure to hold onto your thread at the back so you don’t pull the thread all the way out. Holding onto about an inch or less of thread on the back, move your needle up  1/8” – 1/4” on your sketch and puncture your fabric pushing your needle to the backside again.


Step 7: Follow that same step on the back, moving up approximately 1/8” (attempting to keep each stitch the same length) and push your needle back to the front.


Step 8: Once you have 2-3 stitches on the front in this fashion, it’s time to back stitch to lock your thread in place before moving throughout the entire piece. To back stitch, take your needle that should be on the front of your fabric and backtrack on your stitch pattern to connect the stitches.


Step 9: Once you’ve connected all the stitches on the front, you can give your starting thread a little tug to be sure it can’t be pulled out and then you can start stitching the rest of your design. To continue, follow the same techniques of creating 1 stitch forward on the front, followed by 1 stitch forward on the back and connecting the 2 on the front again.


Step 10: When you’re close to running out of the thread or have finished stitching, pull your needle and thread underneath a stitch on the back of your hoop, then create a loop with your remaining thread and pull your needle through to make a knot. Cut off the remaining thread and start the steps over again to continue your design.


Step 11: As you finish your embroidery, it comes time to add some finishing details to make your new artwork feel complete. To keep your embroidery in the hoop as an adorable and easy way to make framed artwork, cut off the excess fabric around the perimeter of the hoop leaving a 1” border of fabric remaining.


Step 12: Turn your embroidery over and using a glue gun, glue the excess fabric to the inside edge of the wooden hoop. Gently fold over the fabric in small increments as you glue to wrap the embroidery hoop and create a clean edge. 

 Beginner Embroidery Craft Tutorial – Craft Supply Collection Kit - Handmade Modern

Your handmade embroideries are finished and they’re even ready to hang! Rather you’re creating these custom pieces for your own home or personalized them as a gift, they will be a happy reminder of your new favorite hobby!

Thanks for crafting with me and Handmade Modern! We want to see your finished art projects. Post on social media what you created and tag us using the hashtags #handmademodern #gomakestuff


 Tessa Anderstrom

This post is by fiber artist and craft enthusiast Tessa Anderstrom, the owner of handmade shop Studio Jane which focuses on sustainably made home décor and handmade art. As an avid DIYer with a passion for learning new skills, Tessa enjoys sharing that knowledge with crafters of all ages.


]]>
https://southgeorgiaveincenters.com/blogs/handmade-modern-blog/diy-pom-pom-tassel-wall-hanging 2021-08-23T15:27:54-05:00 2022-01-14T04:46:07-06:00 DIY Pom Pom + Tassel Wall Hanging Kid Southgeorgiaveincenters Yarn is one of my favorite craft supplies, the possibilities are endless, and pom poms and tassels are my go-to item to add to a variety of projects! Keychains, gift toppers, garlands, and more are perfect ways to use poms and tassels.

More

]]>

Yarn is one of my favorite craft supplies, the possibilities are endless, and pom poms and tassels are my go-to item to add to a variety of projects! Keychains, gift toppers, garlands, and more are perfect ways to use poms and tassels. For today, we’ll be creating pom poms and tassels in numerous colors to create a wall hanging featuring a painted wooden dowel. I selected a punchy color palette with pops of bright orange yarn and carried that same color palette into the painted details on the dowel, but feel free to make your wall hanging in any shades to coordinate with your room.

We’ll be using the Handmade Modern Pom Pom and Tassel Kit to craft with; it’s the perfect set to get you started on making these simple handmade items; once you get the hang of it, they’re simple and fun to craft!


 Supplies:

  • Handmade Modern Pom Pom + Tassel Kit includes:
    • Yarn in a variety of colors
    • Pom Pom Templates
    • Tassel Templates
    • Twine
    • Sewing Needle
    • Scissors
  • Wooden Dowel 
  • Paint
  • Painter’s Tape


Three Colorfull Pom Poms


Step 1: To start your wall hanging, begin with painting the wooden dowel. Use the painter’s tape to create stripes on both ends of the dowel for clean paint lines. Set the dowel aside to let it dry and get started on the yarn elements. 


Step 2: Make a pom pom first; using the circular C templates that come in three different sizes, select the size you’d like for your pom pom. Holding your yarn and template together in one hand, take the trailing yarn and wrap it around the template by pulling the yarn into the gap of the template and around repeatedly until the template has a thick chunk of yarn on 2/3 of the C shape.


Step 3: Now that your template is full, cut along the outer edge of the template while making sure the yarn stays in the center of the template. Once all the yarn is cut, take an additional piece of yarn, and tie it around the center of the yarn, creating a tight center with a poof of yarn on either side of the template. Now pull the template off the pom pom and trim any longer pieces of yarn to make an even fluff ball of yarn. 

Continue the same steps to make multiple pom poms in varying sizes. To create a similar wall hanging, I made six small and three large pom poms.


Step 4: Next up is making a tassel; use the rectangular template in the kit to create three different sizes of tassels. Holding the template in one hand, add a strand of yarn in the same hand, holding it against the bottom of the template (the top of the template has the cut out in it). Wrap the yarn around the outer edge of the template from bottom to top and around the bottom again, continue wrapping it around the template multiple times to create a thick wrap of yarn. 


You can use multiple colors by holding multiple strands of yarn at the same time and follow the same technique. 


Step 5: Once you’re finished wrapping the template, cut the yarn and tuck the tail of the yarn into the wrapped chunk of yarn. Cut a 6” piece of additional yarn and slide it under the wrapped portion, to be in the center of the wrap. Pull the yarn to the top and tie a double knot around the chunk of yarn. 


Pompom Wall Hanging


Step 6: Using the cut out at the top of the template, take another piece of yarn, and wrap it around both sides of the wrapped portion of yarn and tie a knot to hold all the yarn together, creating a “neck” on your tassel.

You can wrap it around multiple times to create a longer “neck” on your tassel, depending on the style of tassel you’re making.

Step 7: Slide the tassel off the template and cut the yarn at the bottom to separate the yarn on only one end. Trim the loose end of the tassel to make the yarn even. 

Continue the same steps to make multiple tassels in varying sizes. To create a similar wall hanging, I made 3 medium and 1 large tassel. 

Step 8: Arrange your poms and tassels into a composition on your workspace that will feature multiple vertical strands. Then cut strands of yarn that measure 2’-3’ in length, one for each vertical strand you added in your composition; our sample is comprised of 3. Take each piece of yarn and thread the eye of the sewing needle with it and tie a knot at the other end. 

Step 9: Start from the bottom of each line, string all the yarn elements on the strand of the yarn. Push your needle through the bottom of a tassel and the center of a pom pom. Once the strand is complete, tie the excess yarn around the wooden dowel. 

For a similar style, hang the center strand lower to create a triangular style in your wall hanging. After all your strands are tied to the dowel, your new bohemian wall hanging is complete! 


Driftwood & Pom Pom Mobile

Now that you’ve learned how to create pom poms and tassels, you can make countless projects to adorn your home and craft handmade gifts that will make everyone in your life feel special!


Thanks for crafting with me and Handmade Modern! We want to see your finished art projects. Post on social media what you created and tag us using the hashtags #handmademodern #gomakestuff


 Tessa Anderstrom

This post is by fiber artist and craft enthusiast Tessa Anderstrom, the owner of handmade shop Studio Jane which focuses on sustainably made home décor and handmade art. As an avid DIYer with a passion for learning new skills, Tessa enjoys sharing that knowledge with crafters of all ages.

]]>
https://southgeorgiaveincenters.com/blogs/handmade-modern-blog/unboxing-and-art-tutorials-spotlight-artist-studio-collection 2021-07-20T17:44:25-05:00 2022-01-14T05:13:42-06:00 Unboxing and art tutorials spotlight: Artist Studio Collection AKM Borhanich The perfect collection art supplies has arrived - and it’s for adults! Packed up in the cutest suitcase box, tote hours of creativity around (or leave right there on your designated art table.) Paints, Colored Pencils, Canvas and Paper – get ready for your imagination to spark!

More

]]>
Handmade Modern Artist Studio Collection

The perfect collection art supplies has arrived - and it’s for adults! Packed up in the cutest suitcase box, tote hours of creativity around (or leave right there on your designated art table.) Paints, Colored Pencils, Canvas and Paper – get ready for your imagination to spark!


Fine Art Fruit: Acrylic Painting tutorial

Layer by layer, mix and blend your way to a delicious piece of painted fruit. We’ll start with a small canvas but complete a major accomplishment! Your final fruit painting won’t be a perfect rendering but with enough practice, you’ll get there. Grab your Handmade Modern: Artist Studio Collection and let’s make some art!


Handmade Modern Artist Studio CollectionFrom the Box:

  • Mini Canvas
  • Acrylic Paints
  • Brush Set
  • Colored Pencils

Also:

  • Cup of Water
  • Paper Towel
  • Palette or Paper to Mix on


Field of Lavender: Watercolor Painting

This will show you how to start off with simple strokes and create a wildflower wonderland! Your lavender fields can be endless with so many brushes and colors to include. Grab your Handmade Modern: Artist Studio Collection and let’s make some art!

Handmade Modern Artist Studio Collection

From the Box:

  • Watercolors
  • Brush Set 

Also:

  • Cup of Water
  • Paper Towel


Thanks for crafting with me and Handmade Modern! We want to see your finished art projects. Post on social media what you created and tag us using the hashtags #handmademodern #gomakestuff

 Cara Bonilla

After earning a BFA in Graphic Design, Cara Bonilla pursued a career filled with creative expression, which landed her the current title of Senior Creative Director. She’s passionate about all things handmade, filling her days with making tasty meals from scratch, sewing, tending to her moon garden, among other crafty things. Cara lives in Oak Park, IL, with her designer husband, who is equally obsessed with learning and exploring all things that spark creativity.

]]>
https://southgeorgiaveincenters.com/blogs/handmade-modern-blog/paper-garland-diy 2021-06-24T16:19:25-05:00 2022-01-14T05:12:49-06:00 Paper Garland DIY AKM Borhanich Looking for a simple way to make your next event a smash? Then this DIY is perfect for you! Using the Handmade Modern Paper Garland Kit, I created my own vertical garland backdrop that is dreamy for a party and can easily double as a wall hanging long after all your guests go home. 

More

]]>
Looking for a simple way to make your next event a smash? Then this DIY is perfect for you! Using the Handmade Modern Paper Garland Kit, I created my own vertical garland backdrop that is dreamy for a party and can easily double as a wall hanging long after all your guests go home. Rather you’re making a mini backdrop to go behind a dessert table or looking to create an entire photo backdrop, the steps to this craft can be expanded upon to fit any size wall or event. With just a handful of supplies, this craft will quickly become your go to for every occasion, I know it’s one I’ve repeated multiple times using different color palettes to make each event feel unique!

To begin your hanging paper garland, start with selecting your color palette and gathering your materials. In this tutorial, we went with a paired down color scheme of pink and metallic, all these color options are included in the Handmade Modern Paper Garland Kit but feel free to select any color combination that coordinates best with your space or event. In addition to my paper choices, I’m also including the metallic twine and all the colors of paper straws for a well-rounded look.

Handmade Modern Paper Garland Kit

Supplies:

  • Handmade Modern Paper Garland Kit includes:
    • Patterned and Metallic Paper 
    • Paper Straw Segments
    • Metallic Twine
    • Sewing Needle
    • Cardboard Template
  • Wooden Dowel (optional)

Tools:

  • Scissors

Step 1: Trace your template, for this garland I’m using the circular template which can easily be traced 4 times on each sheet of 8” x 8” paper. To complete this multi strand garland backdrop, I used all 4 sheets of each style paper.

 Handmade Modern Paper Garland Kit

Step 2: Once you’ve finished tracing all your circles, it’s time to cut! Simply cut out each circle with a pair of scissors along the line you traced. You can always cut away excess paper to make it easier to be precise or go back to trim away any extra bits to create a smooth edge.

 Handmade Modern Paper Garland Kit

Step 3: Now that all your circles are cut out, it’s time to move onto stringing your garlands, which is like beading a necklace. To start, cut a 3’ length of twine. Since I’m creating multiple strands of garlands to hang vertically together, each strand is approximately 3’ in length.


Handmade Modern Paper Garland Kit


Step 4: Now, thread the eye of your sewing needle with one end of the twine and tie a double knot on the other end. Taking your threaded needle and your first paper circle, flip the circle upside down and puncture your needle through the center of the side without a pattern. Pull your twine through the circle until you get to the knot bottom of your twine.


Step 5: Take your twine and create a 1-2” gap above the circle you just strung on, tie a double knot creating a gap of space from the paper circle to the knot, this will allow some of the metallic twine to show between circles.


Step 6: String a paper straw onto your twine, let it fall to the knot you just created and tie another knot 1-2” above the paper straw. You should have a 2” gap at the top and bottom of your paper straw.


Step 7: Next, you’ll string on a different color or patterned circle and start the pattern over again. You can also skip the gap of twine showing and put a paper straw directly between 2 paper circles as well, I did a varied look so some included twine gaps and some did not.


Step 8: When you get to the end of your twine, unthread your needle and your vertical garland is complete!

If you’re only making one garland, then it’s ready to hang vertically or horizontally depending on your space. But if you’re creating a backdrop or wall hanging, continue the same beading technique for 5 or more strands until you have your desired look.


Step 9: Lastly, a simple way to hang all your garland strands at once is to tie them to a wooden dowel, you can space them further or closer together for a layered look and it can be hung as wall decor or used as a backdrop for events over and over again.

Handmade Modern Paper Garland Kit


Now you can create numerous garlands in a similar fashion with different color combinations, template shapes and more.

We want to see your finished art projects. Post on social media what you created and tag us using the hashtags #handmademodern #gomakestuff


 Tessa Anderstrom

This post is by fiber artist and craft enthusiast Tessa Anderstrom, the owner of handmade shop Studio Jane which focuses on sustainably made home décor and handmade art. As an avid DIYer with a passion for learning new skills, Tessa enjoys sharing that knowledge with crafters of all ages.

]]>